| 1. |
These instructions assume you have a mdoem configured properly in your W2K System.
 |
| 2. |
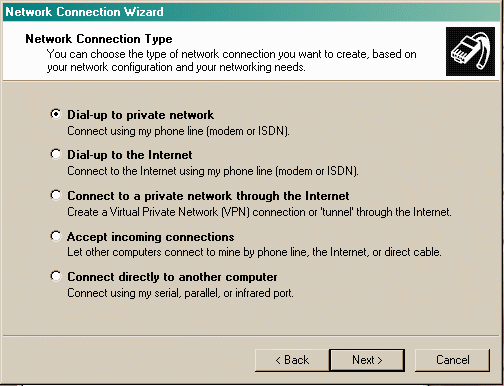
Right click on My Network Places and select Properties to start the Network and Dial Up Connections Manager. Double click on "Make New Connection" to start the wizard.
 |
| 3. |
If prompted, enter your "Dialing Rules" such as area code, call waiting etc.
 |
| 4. |
The first choice in the wizard is Dial Up to a Private Network—this is the correct choice. The 2nd choice, "Dial Up to the Internet" sounds correct, but, will take you through signing up for a new Internet account with a different ISP.

 |
| 5. |
Click on Next and enter a Navpoint phone number to dial into. If you check "Use Dialing Rules", then, the dialing rules you've setup will be the ones used.
 |
| 6. |
Click on Next and assign who will have access to this Dial Up connection. The default is all users.
 |
| 7. |
Click on Next, and, the final window will allow you to name the connection "Chapline Internet"
 |
| 8. |
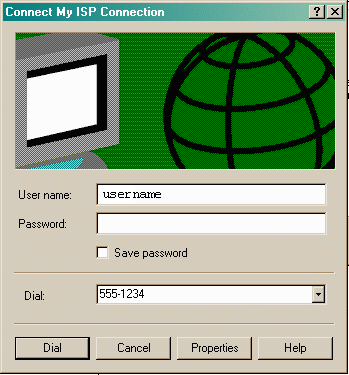
Click on Finish, and, you will be taken to the login window. Click on the Properties button to go to the Advanced Setup.

 |
| 9. |
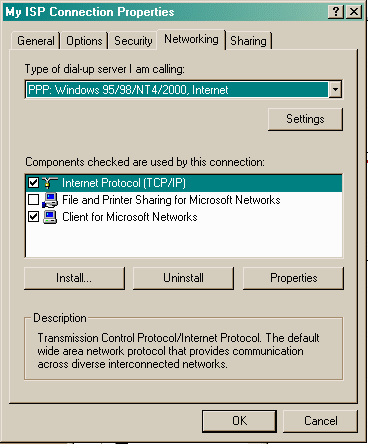
In the Advanced section, go to the Networking tab, highlight TCP/IP and select Properties.

 |
| 10. |
In the TCP/IP Properties section, for the majority of our users, select Obtain IP Address Automatically. Check the box next to Use the following DNS Server Addresses, and, enter the follwing into the two server addresses spaces:
Preferred DNS Server: 207.106.42.10
Alternate DNS Server: 207.106.42.12
 |

